Tis the season for fresh raspberries! The markets in our area are selling beautiful, full-flavored berries at great summertime prices. The time is perfect for eating them to your hearts content, which includes beautiful raspberry desserts like this crisp.
In this crisp, there is a layer of cooked and fresh raspberries sandwiched between rich, buttery, brown sugar and oatmeal layers of crumb mixture. Goodness, it is yummy served warm with a scoop of French Vanilla ice cream. This dessert would work great for a 4th of July celebration, with or without the ice cream, depending on where you are celebrating, of coarse. This is a real family treat. Blessings...
Recipe:
4 cups fresh raspberries, divided
3/4 cup sugar
2 tbsps. cornstarch
1-3/4 cups quick-cooking oatmeal
1 cup unbleached all-purpose flour
1 cup packed brown sugar
1/2 tsp. baking soda
1/2 cup cold butter
1. Crush 1 cup of the raspberries; add enough water to measure 1 cup.
2. In a saucepan, combine sugar and cornstarch; stir in raspberry mixture. Bring to a boil; cook and stir for 2 minutes or until thickened. Remove from heat and cool while you wash the remaining 3 cups of berries needed. Add the berries to the raspberry sauce.
3. In a large bowl, combine oats, flour, brown sugar and baking soda. Cut in butter with a pastry blender until mixture resembles coarse crumbs. Set aside 2 cups of the crumb mixture for topping.
4. Press remaining crumb mixture into a greased 9-inch square baking dish. Spoon cooled berry mixture on top and gently spread to cover; sprinkle with the remaining crumbs. Bake in a 350 degree oven for 25-30 minutes or until top is lightly browned. Serve warm with ice cream or whipped cream.
Yield: 8 servings
This lovely recipe comes from Taste of Home 2001 Annual Recipes cookbook.

Sharing the gift of welcome, recipes, good food, and conversation with friends and family
Thursday, June 27, 2013
Wednesday, June 26, 2013
Pan-Fried Fish Parmesana
This wonderful fish recipe comes from Trader Vic's restaurant in San Francisco via the "San Francisco A La Carte" cookbook. I've made a few adjustments that I thought made it better and easier for the home cook, like you and me. We love fresh Alaskan cod fillets done this way and the recipe also suggests red snapper fillets, which I'm sure are also probably wonderful, but not readily available for us. Blessings...
Recipe:
1 tbsp. fresh lemon juice
1 tbsp. Worcestershire sauce
2 lbs. rock cod or red snapper fillets, cut into 6 pieces
1/2 cup flour
2-3 eggs, lightly beaten (start with 2)
1 cup grated fresh Parmesan cheese
3 tbsps. butter
2 tbsps. olive oil
1. Combine lemon juice and Worcestershire sauce, and sprinkle on both sides of the fish pieces. Salt and pepper the fish.
2. Combine the flour and Parmesan cheese in a pie plate or other flat dish for dipping.
3. In a large heavy skillet melt the butter and oil over medium heat.
4. Dip the fish pieces in the egg wash and then dip to coat generously in the flour-cheese mixture. Fry the fish until a deep golden brown, about 5 minutes and turn to brown the second side, about another 5 minutes. Fish is done when it flakes with a fork. If you happen to get very thin pieces of the tail of the fish, you won't need to fry it much more than 5 minutes total.
Yield: 6 servings
Note: This recipe is easily cut in half to serve two people.
Recipe:
1 tbsp. fresh lemon juice
1 tbsp. Worcestershire sauce
2 lbs. rock cod or red snapper fillets, cut into 6 pieces
1/2 cup flour
2-3 eggs, lightly beaten (start with 2)
1 cup grated fresh Parmesan cheese
3 tbsps. butter
2 tbsps. olive oil
1. Combine lemon juice and Worcestershire sauce, and sprinkle on both sides of the fish pieces. Salt and pepper the fish.
2. Combine the flour and Parmesan cheese in a pie plate or other flat dish for dipping.
3. In a large heavy skillet melt the butter and oil over medium heat.
4. Dip the fish pieces in the egg wash and then dip to coat generously in the flour-cheese mixture. Fry the fish until a deep golden brown, about 5 minutes and turn to brown the second side, about another 5 minutes. Fish is done when it flakes with a fork. If you happen to get very thin pieces of the tail of the fish, you won't need to fry it much more than 5 minutes total.
Yield: 6 servings
Note: This recipe is easily cut in half to serve two people.
Tuesday, June 25, 2013
Slow Cooker Golden Mushroom Pork and Apples
I know that most people don't think of summer as the time to be using the slow cooker, but it is a very cost saving help in the kitchen because of the low energy use and it doesn't warm the kitchen up as much as one might think. I use mine year around because I love the convenience of having the meal done in advance of the dinner hour. This particular recipe is another one that I have adapted from a recipe found at http://www.campbellskitchen.com. This is such a good site for recipes; I would encourage you to check it out.
The one challenge I've found with slow cooker recipes, like the original of this one, is that the flavor can be lacking in the interest of speed. Not a good trade-off at all! So, in reading Cook's Illustrated Magazine, I learned that if the meat is browned in oil first the flavor of the finished dish is much better, and it only takes a few minutes more of your time. Also, with this recipe, by adding the apples at the beginning of the cooking time, they will cook down to an applesauce consistency and really enhance the flavor of the pork and the gravy, but if you don't think your family would like that, add them for the last hour or two instead.
The effort put into preparing a meal is rewarded by the nurturing of the hearts and lives of those around the table, and your family is strengthened. Blessings...
Recipe:
2 cans (10 3/4 ounces each) Campbell's Condensed Golden Mushroom Soup
1/2 cup water
1 tbsp. packed brown sugar
1 tbsp. Worcestershire sauce
1 tsp. dried thyme leaves, crushed
8 boneless pork chops, 3/4-inch thick (about 2 pounds)
4 large Granny smith apples, cut into quarters and then each quarter sliced into thirds.
2 cups chopped onion
salt and pepper
olive oil for frying
1. Stir the soup, water, brown sugar, Worcestershire and thyme in a slow cooker set on high heat.
2. Heat a little olive oil in a large skillet set over medium heat. Salt and pepper pork chops and brown in olive oil on both sides; remove and place in slow cooker. Saute onion until golden brown and add to slow cooker. Add apple slices on top; don't stir them into the gravy.
3. Cover slow cooker and cook on high heat for one hour; turn heat down to low and continue cooking for about 4 more hours or until pork is fork tender. We loved the meat served with mashed potatoes.
Yield: 8 servings
Note: This recipe is easily cut in half for a smaller family.
The one challenge I've found with slow cooker recipes, like the original of this one, is that the flavor can be lacking in the interest of speed. Not a good trade-off at all! So, in reading Cook's Illustrated Magazine, I learned that if the meat is browned in oil first the flavor of the finished dish is much better, and it only takes a few minutes more of your time. Also, with this recipe, by adding the apples at the beginning of the cooking time, they will cook down to an applesauce consistency and really enhance the flavor of the pork and the gravy, but if you don't think your family would like that, add them for the last hour or two instead.
The effort put into preparing a meal is rewarded by the nurturing of the hearts and lives of those around the table, and your family is strengthened. Blessings...
Recipe:
2 cans (10 3/4 ounces each) Campbell's Condensed Golden Mushroom Soup
1/2 cup water
1 tbsp. packed brown sugar
1 tbsp. Worcestershire sauce
1 tsp. dried thyme leaves, crushed
8 boneless pork chops, 3/4-inch thick (about 2 pounds)
4 large Granny smith apples, cut into quarters and then each quarter sliced into thirds.
2 cups chopped onion
salt and pepper
olive oil for frying
1. Stir the soup, water, brown sugar, Worcestershire and thyme in a slow cooker set on high heat.
2. Heat a little olive oil in a large skillet set over medium heat. Salt and pepper pork chops and brown in olive oil on both sides; remove and place in slow cooker. Saute onion until golden brown and add to slow cooker. Add apple slices on top; don't stir them into the gravy.
3. Cover slow cooker and cook on high heat for one hour; turn heat down to low and continue cooking for about 4 more hours or until pork is fork tender. We loved the meat served with mashed potatoes.
Yield: 8 servings
Note: This recipe is easily cut in half for a smaller family.
Friday, June 21, 2013
In Praise of Soup and Sandwich Dinners
On a busy day, or at the end of the week, it is a blessing to cut dinner prep short and put soup and sandwiches on the table. This week was particularly busy and by last evening there were a few leftover items in the fridge that I could combine with a Tuna Melt Sandwich, and I knew all would be well because my hubby loves Tuna Melts.
I first encountered a Tuna Melt years ago in a restaurant in southern California when I was away at school. I never even thought about making them at home until I had a family and going out for a tuna sandwich was no longer in the budget. They are so good, easy to prepare and my family liked them, so they became a mainstay on our menu plan.
Here we are having them alongside what remained of the Pinto Bean Soup that my friend and I had for our lunch this week. This recipe is posted on 1/9/2010. We also finished up the Fresh Raspberry Pie that was posted on 6/18/2013. Have a wonderful weekend, and if it is a busy time, enjoy some soup and a sandwich for dinner. Blessings...
Recipe:
Canned tuna made with a bit of mayonnaise to moisten and bind it together.
Slices of medium Cheddar cheese
Slices of fresh tomato
Bread of choice
1. Spread the amount of tuna filling you wish on one slice of bread, top with slices of tomato and then top this with slices of cheese topped off with the second slice of bread.
2. Butter the top slice of bread and place in a frying pan or on a griddle, buttered side down. Butter the second slice of bread.
3. Cook over medium-low heat until bread is toasted to a golden brown. Flip over to brown second side. Sandwich is done when bread is beautifully toasted and cheese is melted. Yummy!
I first encountered a Tuna Melt years ago in a restaurant in southern California when I was away at school. I never even thought about making them at home until I had a family and going out for a tuna sandwich was no longer in the budget. They are so good, easy to prepare and my family liked them, so they became a mainstay on our menu plan.
Here we are having them alongside what remained of the Pinto Bean Soup that my friend and I had for our lunch this week. This recipe is posted on 1/9/2010. We also finished up the Fresh Raspberry Pie that was posted on 6/18/2013. Have a wonderful weekend, and if it is a busy time, enjoy some soup and a sandwich for dinner. Blessings...
Recipe:
Canned tuna made with a bit of mayonnaise to moisten and bind it together.
Slices of medium Cheddar cheese
Slices of fresh tomato
Bread of choice
1. Spread the amount of tuna filling you wish on one slice of bread, top with slices of tomato and then top this with slices of cheese topped off with the second slice of bread.
2. Butter the top slice of bread and place in a frying pan or on a griddle, buttered side down. Butter the second slice of bread.
3. Cook over medium-low heat until bread is toasted to a golden brown. Flip over to brown second side. Sandwich is done when bread is beautifully toasted and cheese is melted. Yummy!
Wednesday, June 19, 2013
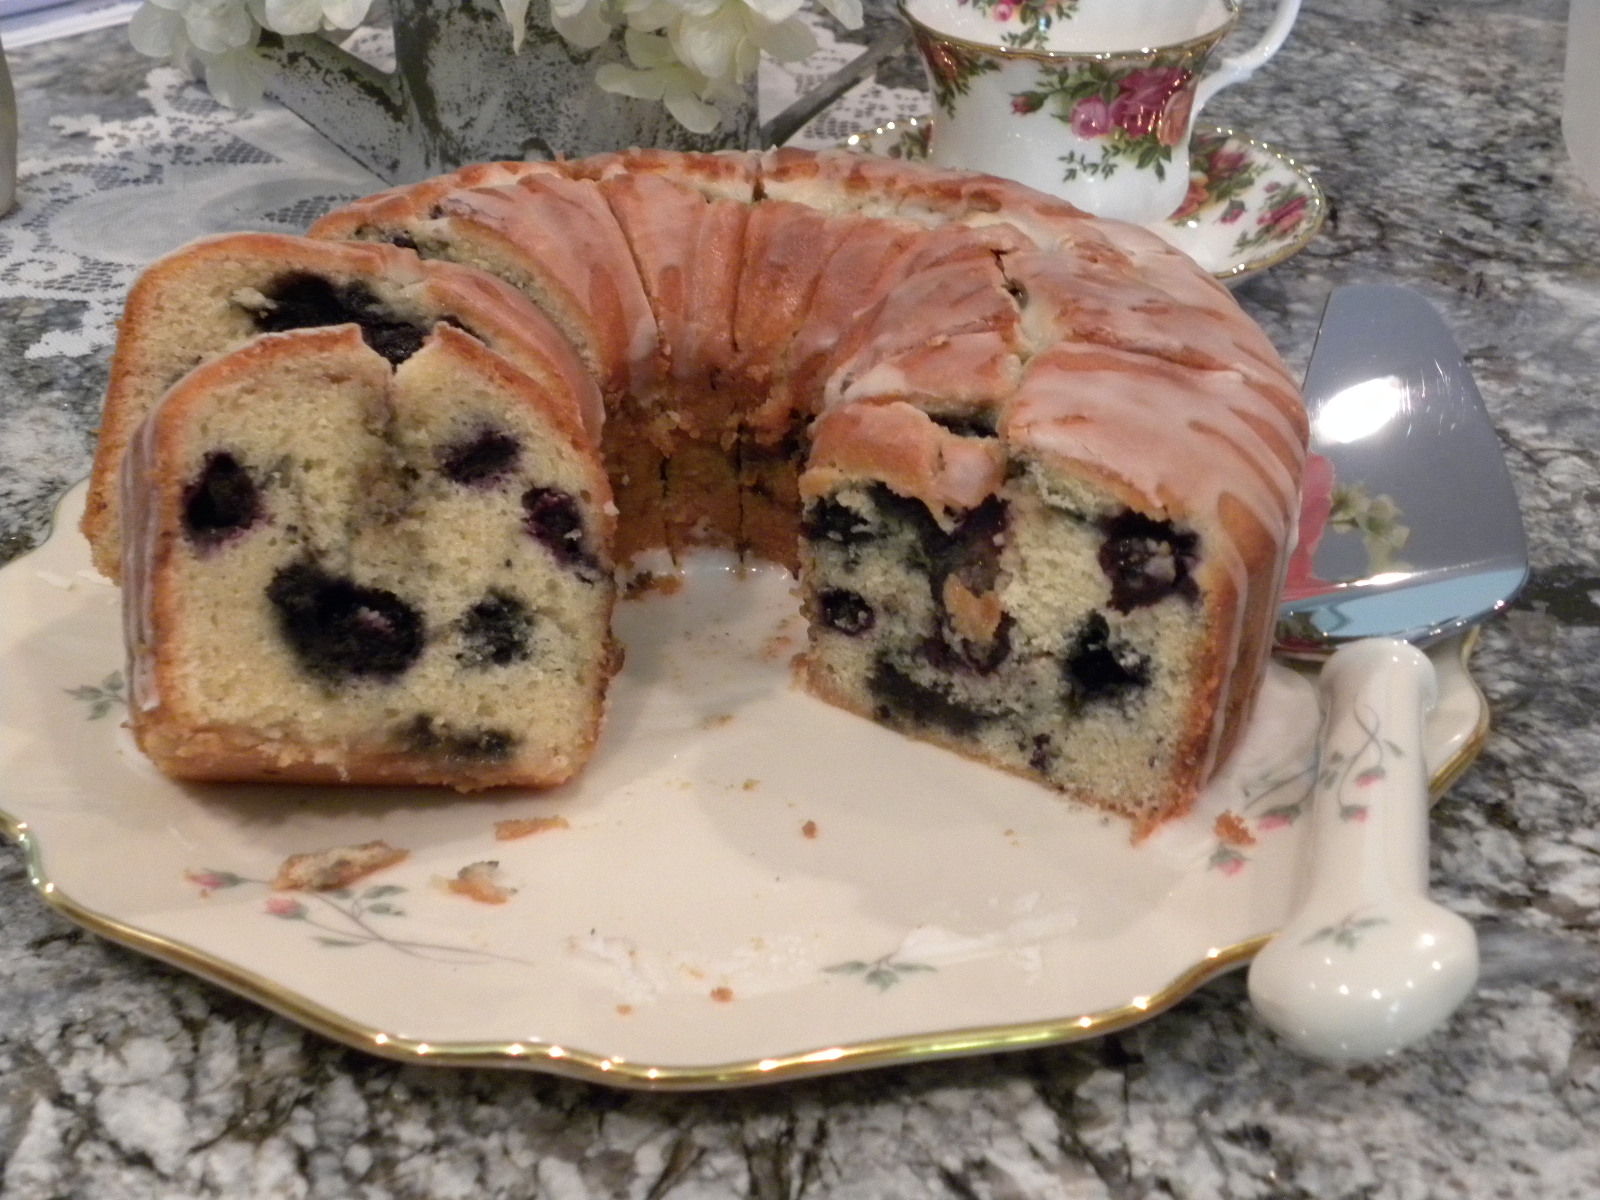
Blueberry Sour Cream Coffee Cake
Yesterday, a friend that I hadn't spent time with in ages was able to join me for lunch and a wonderful time of catching up. This precious friend is so easy to have as a guest. She just loves to eat and hates to cook, so she really appreciates any effort put forth for her, and she is easy to please. And, like me she loves soup any time of the year, so I made the recipe for Pinto Bean Soup that is posted on 1/9/2010, she brought some fruit and I pulled this wonderful blueberry coffee cake out of the freezer from a few weeks ago. Little did I know that blueberries are her favorite fruit, so this choice was a real winner. She thought it was as delicious as my hubby and I did, and I was thrilled that my friend was blessed. After all, isn't that what cooking for those we care about is all about? Blessings...
Recipe:
3/4 cup butter, softened
1-1/2 cups sugar
4 eggs
1 tsp. vanilla
3 cups unbleached flour
1-1/2 tsps. baking powder
3/4 tsp. baking soda
1/4 salt
1 cup low-fat sour cream
Filling:
1/4 cup packed brown sugar
1 tbsp. unbleached flour
1/2 tsp. ground cinnamon
2 cups fresh or frozen blueberries (do not thaw frozen berries)
Glaze:
1 cup powdered sugar
2-3 tsps. milk or more
1. In a large mixing bowl, cream butter and sugar. Add eggs, one at a time, beating well after each addition. Beat in vanilla.
2. Combine dry ingredients; add to creamed mixture alternately with the sour cream beginning and ending with flour mixture.
3. Spoon a third of the batter into a greased and floured 10-inch tube pan. Combine brown sugar, flour and cinnamon; sprinkle half over batter. Top with half of the berries. Repeat layers. Top with remaining batter.
4. Bake in a 350 degree oven for 55-65 minutes or until a toothpick inserted near the center comes out clean. Cool for 10 minutes before removing from pan to a wire rack to cool completely.
5. To make glaze, add milk to powdered sugar 1 tsp. at a time until a good drizzling consistency.
Yield: 12 servings
Recipe:
3/4 cup butter, softened
1-1/2 cups sugar
4 eggs
1 tsp. vanilla
3 cups unbleached flour
1-1/2 tsps. baking powder
3/4 tsp. baking soda
1/4 salt
1 cup low-fat sour cream
Filling:
1/4 cup packed brown sugar
1 tbsp. unbleached flour
1/2 tsp. ground cinnamon
2 cups fresh or frozen blueberries (do not thaw frozen berries)
Glaze:
1 cup powdered sugar
2-3 tsps. milk or more
1. In a large mixing bowl, cream butter and sugar. Add eggs, one at a time, beating well after each addition. Beat in vanilla.
2. Combine dry ingredients; add to creamed mixture alternately with the sour cream beginning and ending with flour mixture.
3. Spoon a third of the batter into a greased and floured 10-inch tube pan. Combine brown sugar, flour and cinnamon; sprinkle half over batter. Top with half of the berries. Repeat layers. Top with remaining batter.
4. Bake in a 350 degree oven for 55-65 minutes or until a toothpick inserted near the center comes out clean. Cool for 10 minutes before removing from pan to a wire rack to cool completely.
5. To make glaze, add milk to powdered sugar 1 tsp. at a time until a good drizzling consistency.
Yield: 12 servings
Tuesday, June 18, 2013
Fresh Raspberry Pie, Yummy!
Fresh raspberries bake up beautifully in this delicious pie. The crust recipe presented here is a good one, but certainly would not have to be used. I found that I had to gently work the crust ingredients with my fingers to get them to combine completely, but do use a light touch so you don't toughen the crust. When the raspberries are combined they will break up some, but this process doesn't hurt the pie or its appearance at all. This is a very simple recipe using one of summers best fruits in a wonderful way. If your family loves raspberries as much as mine does, they will love this pie. Blessings...
Recipe:
Crust:
2 cups unbleached flour
1 tbsp. sugar
1/2 tsp. salt
3/4 cup shortening
1 egg, beaten
3 tbsps. ice water
1 tbsp. white vinegar
Filling:
1-1/3 cups sugar
2 tbsps. quick-cooking tapioca
2 tbsps. cornstarch
5 cups fresh or frozen unsweetened raspberries, thawed
Glaze:
1/2 - 1 tbsp. milk
1 tbsp. sugar (I use sugar decorating crystals because they don't melt into the crust, but leave a beautiful crystal appearance on the crust)
1. In a large bowl, combine the flour, sugar and salt; cut in shortening until the mixture resembles coarse crumbs.
2. Combine egg, water and vinegar; stir into flour mixture to combine. You may need to gently work with your fingers until combined.
3. Divide the dough in half so that one ball is slightly larger than the other; wrap each in plastic wrap. Refrigerate dough for 30 minutes or until easy to handle. This may take up to an hour, which is great since the fresh raspberries need to be washed.
4. In a small bowl, combine the sugar, tapioca and cornstarch.
5. Wash fresh raspberries, drain on paper toweling and place them in a large bowl. Stir the sugar mixture into the berries and let them sit for 15 minutes.
6. On a lightly floured surface, roll out the larger ball of dough to fit a 9-inch pie plate. Transfer the dough to pie plate; trim the dough to about 1/2-inch over edge of plate. Add the raspberry filling.
7. Roll out the remaining dough to fit top of pie; place over filling. Trim, seal and flute edges. Cut slits in top. Brush with milk; sprinkle with sugar. Bake at 350 degrees for 50-55 minutes or until crust is golden brown and filling is bubbly. Cool on a wire rack.
Yield: 6-8 servings
Note: Cool pie completely so the filling will set. If you want to warm the pie for dessert, heat individual pieces for 15-20 seconds in the microwave, add a scoop of vanilla ice cream and dig in!
Recipe:
Crust:
2 cups unbleached flour
1 tbsp. sugar
1/2 tsp. salt
3/4 cup shortening
1 egg, beaten
3 tbsps. ice water
1 tbsp. white vinegar
Filling:
1-1/3 cups sugar
2 tbsps. quick-cooking tapioca
2 tbsps. cornstarch
5 cups fresh or frozen unsweetened raspberries, thawed
Glaze:
1/2 - 1 tbsp. milk
1 tbsp. sugar (I use sugar decorating crystals because they don't melt into the crust, but leave a beautiful crystal appearance on the crust)
1. In a large bowl, combine the flour, sugar and salt; cut in shortening until the mixture resembles coarse crumbs.
2. Combine egg, water and vinegar; stir into flour mixture to combine. You may need to gently work with your fingers until combined.
3. Divide the dough in half so that one ball is slightly larger than the other; wrap each in plastic wrap. Refrigerate dough for 30 minutes or until easy to handle. This may take up to an hour, which is great since the fresh raspberries need to be washed.
4. In a small bowl, combine the sugar, tapioca and cornstarch.
5. Wash fresh raspberries, drain on paper toweling and place them in a large bowl. Stir the sugar mixture into the berries and let them sit for 15 minutes.
6. On a lightly floured surface, roll out the larger ball of dough to fit a 9-inch pie plate. Transfer the dough to pie plate; trim the dough to about 1/2-inch over edge of plate. Add the raspberry filling.
7. Roll out the remaining dough to fit top of pie; place over filling. Trim, seal and flute edges. Cut slits in top. Brush with milk; sprinkle with sugar. Bake at 350 degrees for 50-55 minutes or until crust is golden brown and filling is bubbly. Cool on a wire rack.
Yield: 6-8 servings
Note: Cool pie completely so the filling will set. If you want to warm the pie for dessert, heat individual pieces for 15-20 seconds in the microwave, add a scoop of vanilla ice cream and dig in!
Friday, June 14, 2013
Raspberry Gelatin Salad
My family loves raspberries, so with that in mind, I'm always looking for or creating new ways to use this wonderful fruit. This bright and refreshing salad is great alongside other salads for a light summer meal or would make a nice light dessert topped with a little whipped topping or whipped cream.
I've served the raspberry salad here with Pajaro Valley Coleslaw Crunch, recipe posted on 5/20/2013 and Hawaiian Chicken Salad, recipe posted on 6/7/2013. Have a wonderful Father's Day celebration on Sunday with your family. Blessings...
Recipe:
1 pkg. (.3 oz.) sugar-free raspberry gelatin
3/4 cup boiling water
3 Dreyers Outshine Raspberry Fruit Ice bars, thawed (you will have just over 1 cup softened ice)
1 cup fresh raspberries, washed and gently dried or 1-1/4 cups frozen berries (don't thaw)
1. In a 4 x 8-inch loaf pan or in a serving bowl, dissolve gelatin in boiling water.
2. Stir in thawed raspberry fruit ice until combined. Stir in fresh or frozen raspberries; chill until set. (The frozen berries will cause the gelatin to set very quickly, and since they are frozen, they will not release juice to dilute the gelatin).
Yield: 8 servings
43 calories each, 1.4 gms. fiber
Note: If you prefer to use reg. gelatin with sugar, the calorie count will be 82 calories per serving. Still very low in calories!
Note: Dreyers Outshine bars are a wonderful fat free fruit ice bar. If you have not had the opportunity to purchase them, they are a very good kid-friendly snack made with real fruit or a great low calorie dessert.
I've served the raspberry salad here with Pajaro Valley Coleslaw Crunch, recipe posted on 5/20/2013 and Hawaiian Chicken Salad, recipe posted on 6/7/2013. Have a wonderful Father's Day celebration on Sunday with your family. Blessings...
Recipe:
1 pkg. (.3 oz.) sugar-free raspberry gelatin
3/4 cup boiling water
3 Dreyers Outshine Raspberry Fruit Ice bars, thawed (you will have just over 1 cup softened ice)
1 cup fresh raspberries, washed and gently dried or 1-1/4 cups frozen berries (don't thaw)
1. In a 4 x 8-inch loaf pan or in a serving bowl, dissolve gelatin in boiling water.
2. Stir in thawed raspberry fruit ice until combined. Stir in fresh or frozen raspberries; chill until set. (The frozen berries will cause the gelatin to set very quickly, and since they are frozen, they will not release juice to dilute the gelatin).
Yield: 8 servings
43 calories each, 1.4 gms. fiber
Note: If you prefer to use reg. gelatin with sugar, the calorie count will be 82 calories per serving. Still very low in calories!
Note: Dreyers Outshine bars are a wonderful fat free fruit ice bar. If you have not had the opportunity to purchase them, they are a very good kid-friendly snack made with real fruit or a great low calorie dessert.
Subscribe to:
Posts (Atom)